|
|
Bob's Shop Notes: |
|
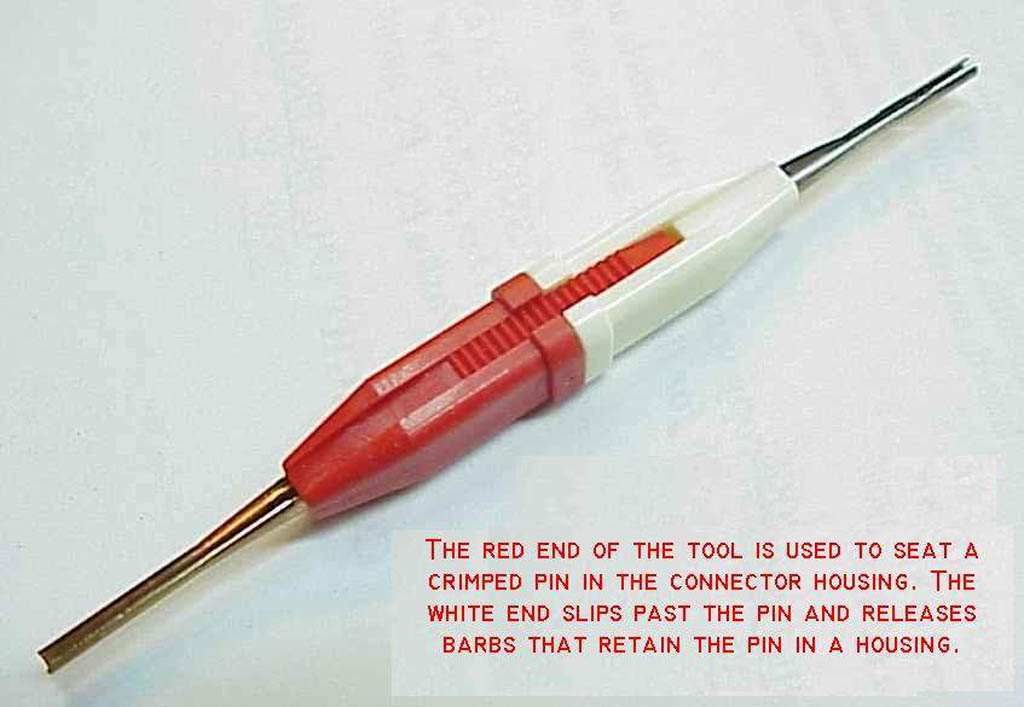
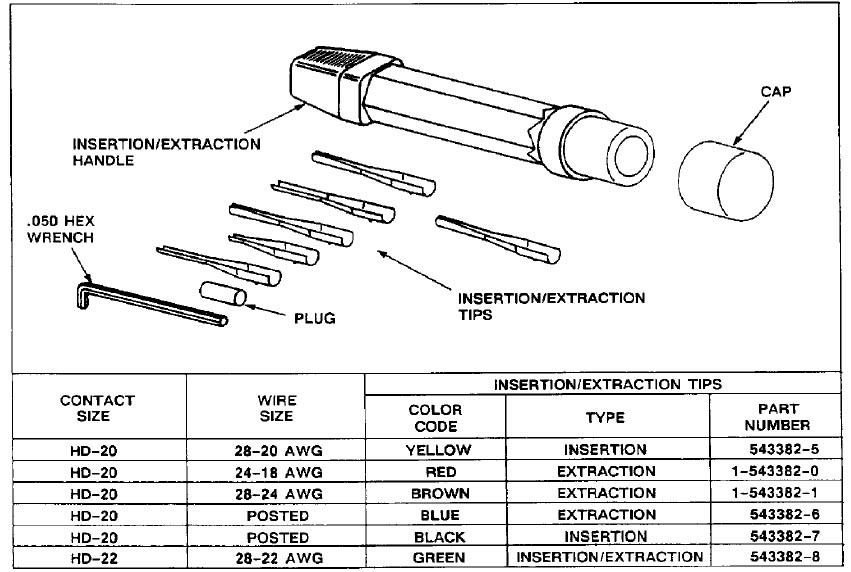
Click here for larger image. Let's consider the features and functionality of a typical insertion/extraction tool for connectors having removable pins. In this case, I show a tool for D-Sub connectors. There are semi-standard colors for extraction tools of various application to assist the technician in picking the right one out of the tool box. For the D-sub tool, the white end is for extraction and the red end is for insertion. Note that tools for both the standard density (20AWG pins) and high density (22AWG) pins are the same colors and VERY close to the same sizes. It's easy to get them mixed up. More on this later. Unless you're trying to push a pin into place crimped on the end of a 24 or perhaps 26AWG (ugh!) wire, you'll find little use for the red end of the tool. 22 and 20AWG wires are sufficiently stiff to permit installation by simply pushing the terminated wire into place in the connector. |
|
|
Click here for larger image. The extraction tool is a thin metal sleeve designed to drop over the wire grip of the crimped pin and push back the pin retention barbs molded into the connector housing. Note that there are TWO sizes of D-Sub pins and tools. The older (50 years) and most common is the 20AWG standard density. More recently, manufacturers have offered 22AWG "Hi-Density" versions that offer more wires in the same connector. For example, a 9-pin 20AWG sized housing will hold 15 pins in the high density version. Both tools are the red/white combination and it's possible that when you believe your tool is correct for one size, you in fact have the wrong tool. |
|
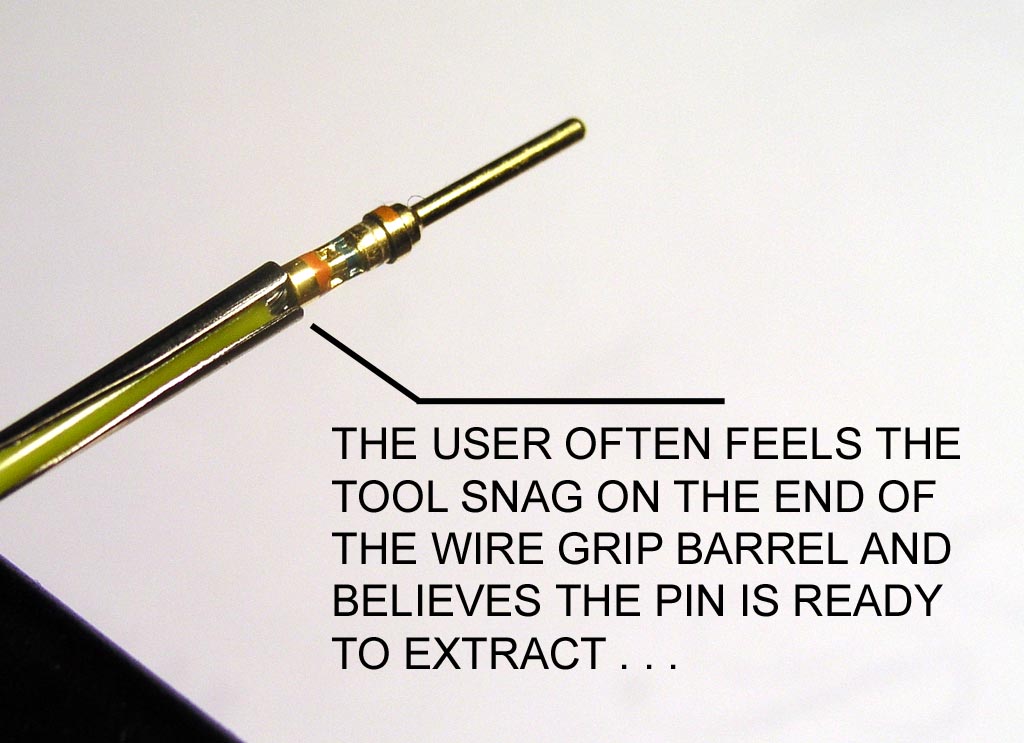
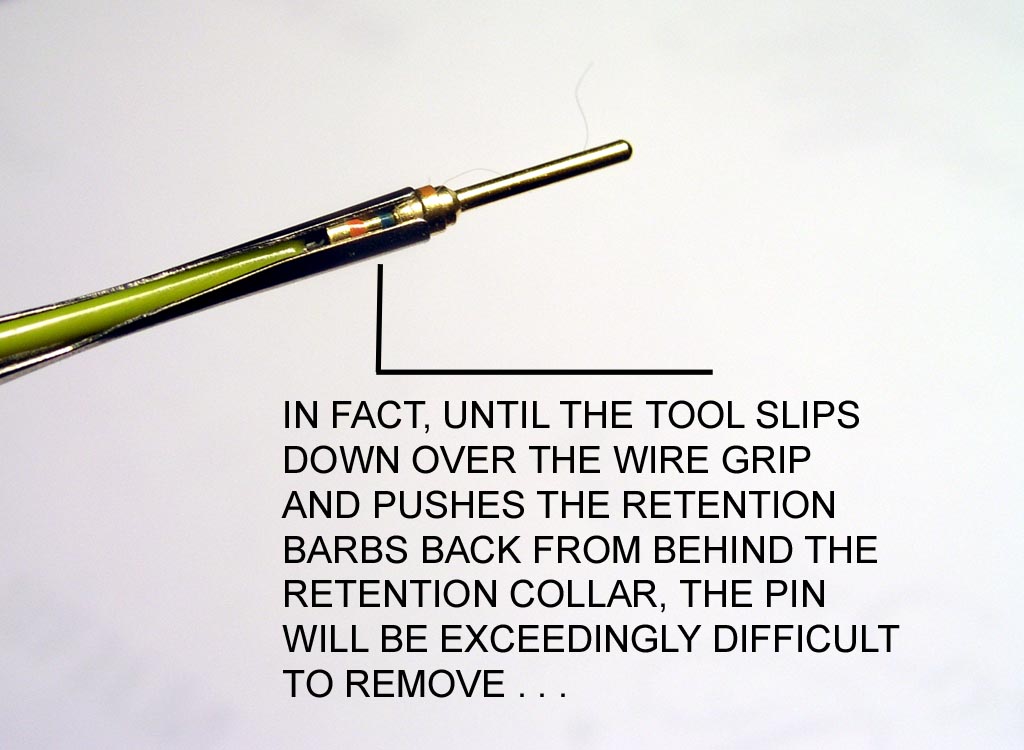
Click here for larger image. It's easy to tell. Crimp an exemplar pin on a wire and see if you can slip the tool down over the wire grip barrel as shown here. On several occasions, I've ordered 20AWG tools and received 22AWG tools by mistake. This simple exercise will resolve the question. When trying to extract a pin from a housing, the obvious goal is to slide the tool down over the wire-grip as shown here . . . |
|
|
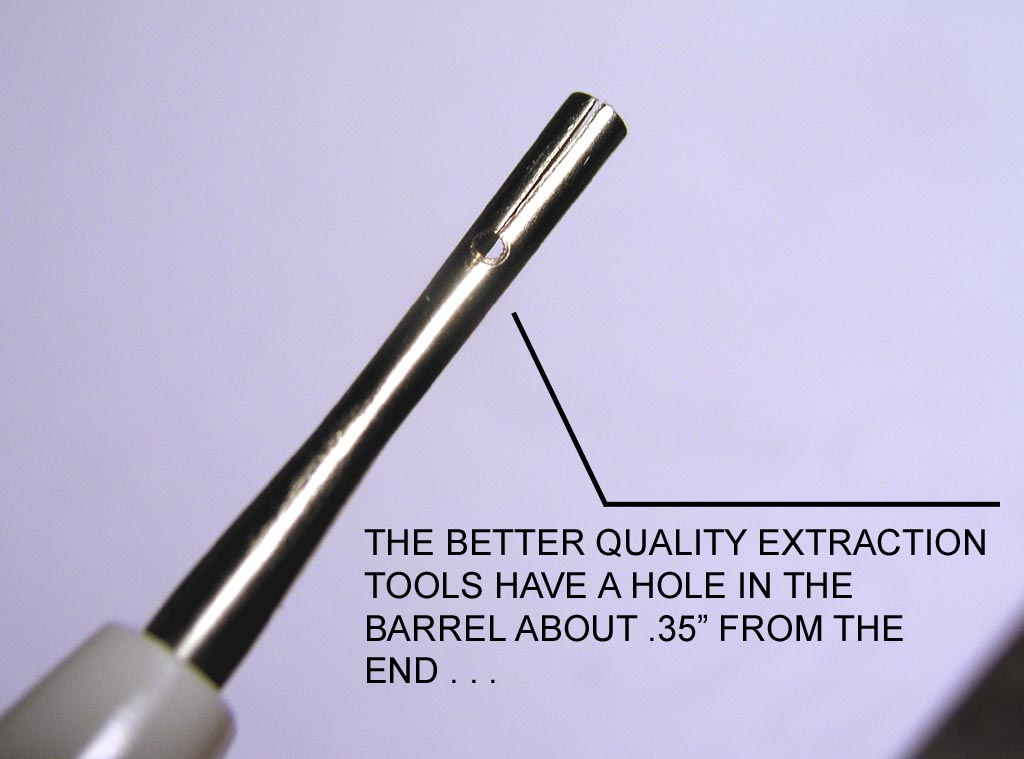
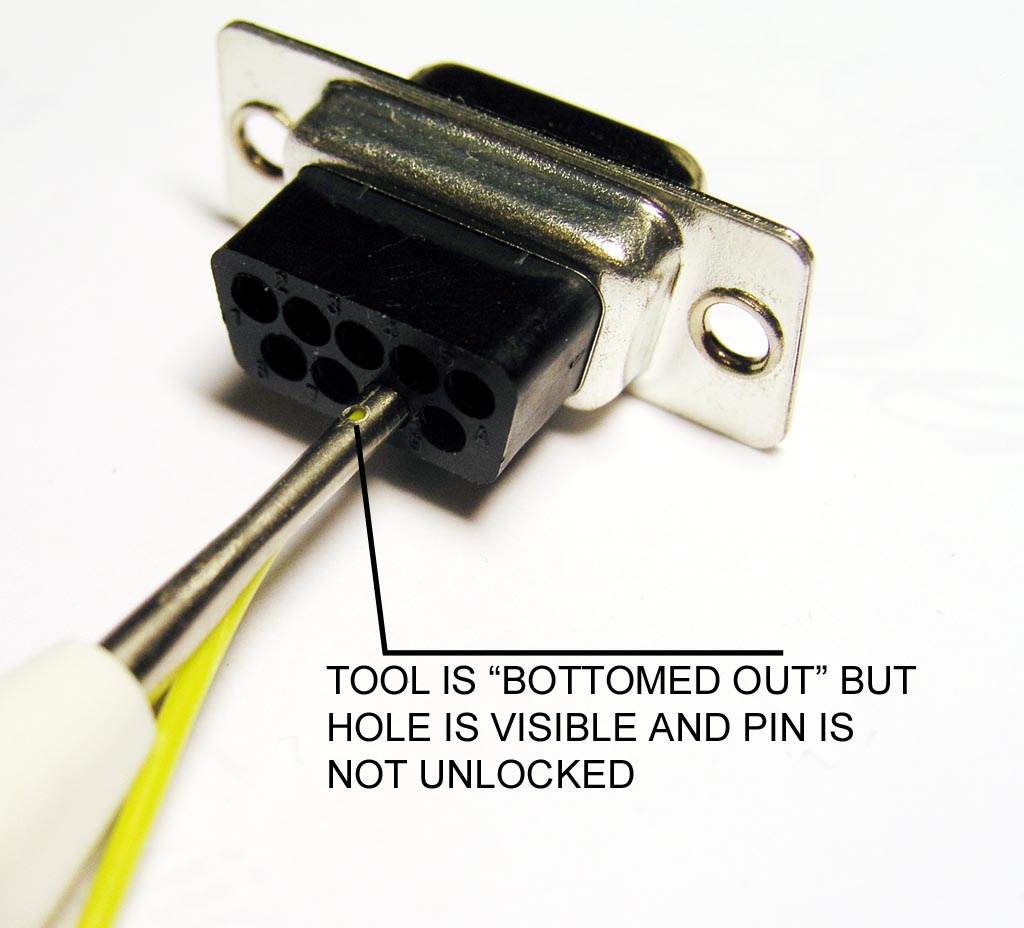
Click here for larger image. Most but not all manufacturers for these tools will put a hole in the barrel about .35" from the end as seen here. This is a REALLY useful aid for telling if the tool has been properly positioned for pin extraction. |
|
Click here for larger image. If you feel the tool "bottom out" but the hole is still visible, you're not ready to pull the pin out . . . |
|
|
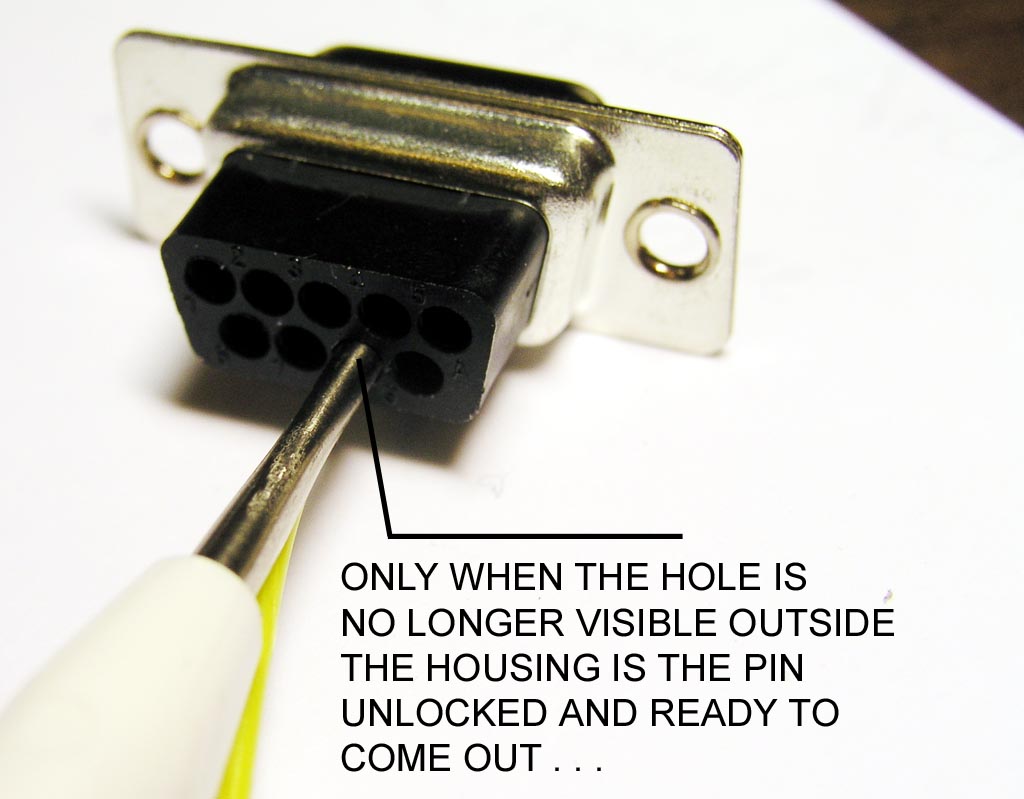
Click here for larger image. When the hole is no longer visible outside the connector housing, the retention barbs are pushed back and the pin is ready for removal and will slip out very easily. If there is resistance to removal, try rotating the tool a bit while applying the pulling force. Keep in mind that the retention barbs encircle the pin's retention collar while the extraction tool only covers about 75% of the circumference. A slight twisting motion will encourage a retention barb sticking through the gap to release it's grip.
|
|
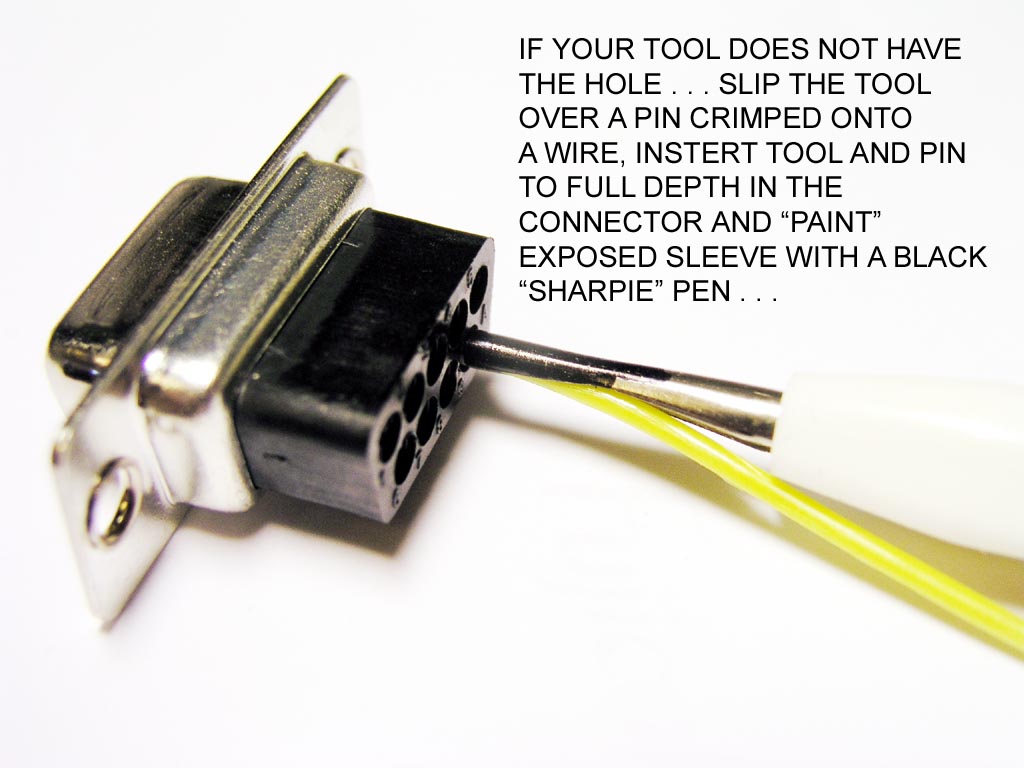
Click here for larger image. If your tool comes without the handy hole, slip the tool over a pin crimped onto a wire as shown in the second image above, push it into a connector housing and use a magic marker to "paint" the exposed surfaces of the barrel.
|
|
|
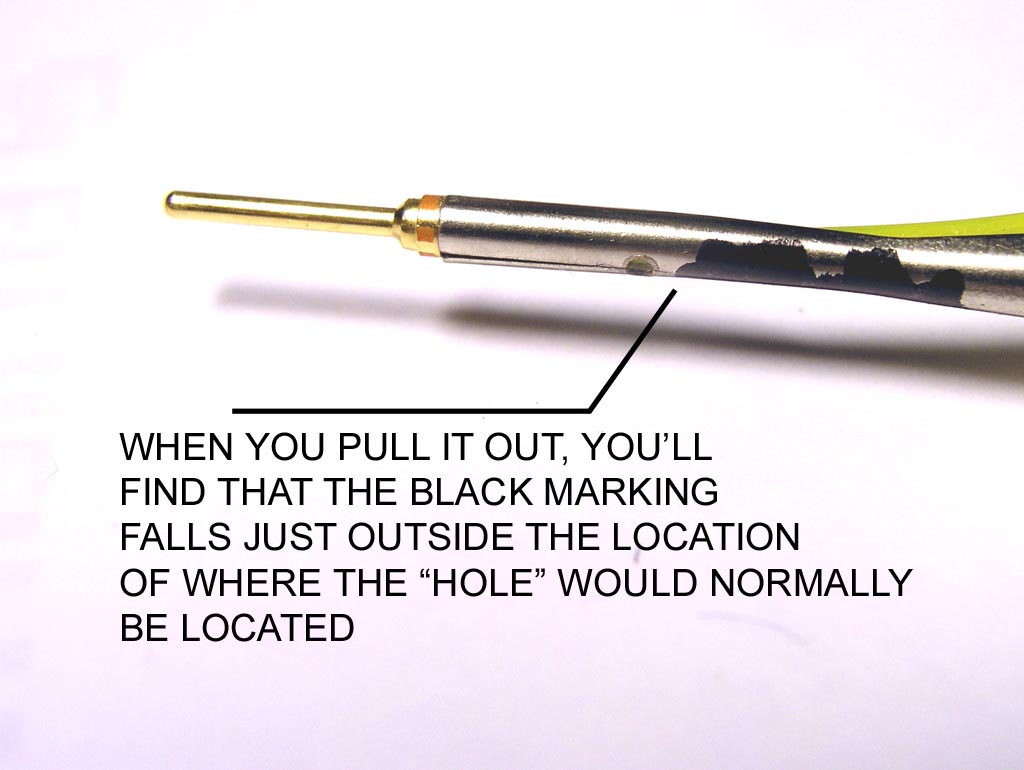
Click here for larger image. Here we see how far the hole will drop into the housing. The paint ends at the rear surface of the housing and the hole would be completely out of sight when the tool is properly seated for pin extraction. You can use your paint to substitute for the missing hole. After you've used this tool for a time, you'll find that your "feel" has become calibrated to the task and visual inspection for the hidden-hole (or paint-ring-against-the-housing) is no longer necessary. The task is to understand what the tool is doing for you inside the connector where the effects cannot be observed but only felt. |
|
Click here for larger image. If you'd like to own the Cadillac of D-Sub pin extraction and insertion tools, consider the Tyco_Amp 91285-1 shown here. Click Here for more information. You can acquire this tool from Digikey and others for about $15.
|
|
 Click here to contact Bob at AeroElectric Connection Click here to contact Bob at AeroElectric Connection |